
Cart is empty.
Item Quantity Price Total: $0

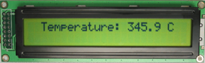
Setting Up a Ceramics Kiln Temperature Monitor with LCD Display
PARTS LIST
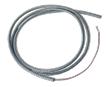
Thermocouples |
||||||||||||
|
 |
 |
 |
 |

1) Power off everything.
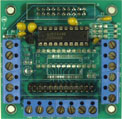
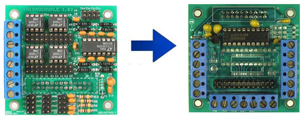
2) Install THERMOCOUPLE-4 board on top of DAQ-2543. Use our spacer kit if needed.
3) Install LCD242 or VFD202 to MINI-MAX/51-C2 using the flat cable attached to the display.

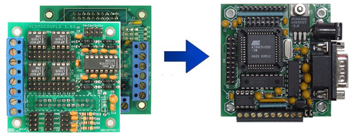
4) Install DAQ-2543 + THERMOCOUPLE-4 combination on top of MINI-MAX/51-C2. Use our spacer kit if needed.
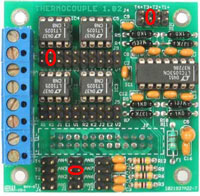
5) Connect your thermocouple(s) to the terminal blocks on THERMOCOUPLE-4 board. Our example uses Thermocouple Channel 3 ( T3+ and T3- ).
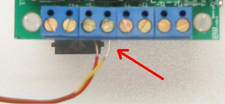
6) Configure the jumpers on THERMOCOUPLE-4 board for your thermocouple type ( e.g. J, K, ... ) . Our example uses K-type thermocouple. Jumpers to be installed are K3, T3+, AN3.
7) Connect the MINI-MAX/51-C2 to your PC's serial (COM) port using the serial cable of MINI-MAX/51-C2.
8) Apply power to the setup.
9) Start BASCOM51 on your PC.
10) Open thermocouple project from examples\thermocouple\1_channel_lcd and download to the MINI-MAX/51-C2.
11) Open the terminal window in Micro-IDE and connect the terminal to the serial port that is connected to MINI-MAX/51-C2. You will see the temperature being displayed on both the terminal window and on the LCD display.
If you wish , you can disconnect the system from the PC and use only the LCD display to view the temperature.