Cart is empty.
Item Quantity Price Total: $0

Visual Plug-in Modules for Peripheral Simulation
Visual Plug-in Modules are COM objects that can be added to your project to simulate peripheral hardware, such as LCD displays, LED indicators, chipsets and even BiPOM peripheral boards.
The following steps help you add Visual Plug-in Modules to your project.
1. Create a new project or open an existing project in MicroIDE.
2. To change the project settings of the current project, select "Settings" under "Project" menu and select "Visual Plugins" tab.
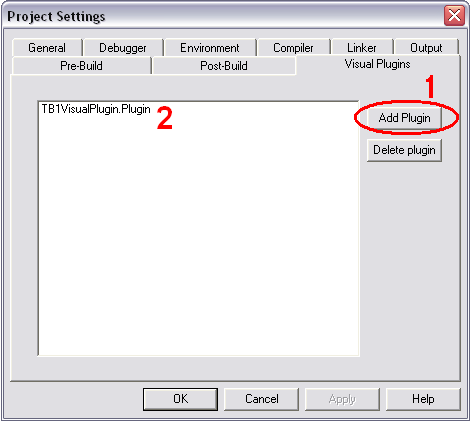
3. You can add new Plug-in Modules to the current project by clicking "Add Plugin" button (marked as 1 on the picture above).
List of Plug-in Modules which was added to current project is at the left side of window (marked as 2 on the picture above).
4. To add a new Visual Plugin, click "Add Plugin" button. "Add Visual Plugin" dialog window will be shown.
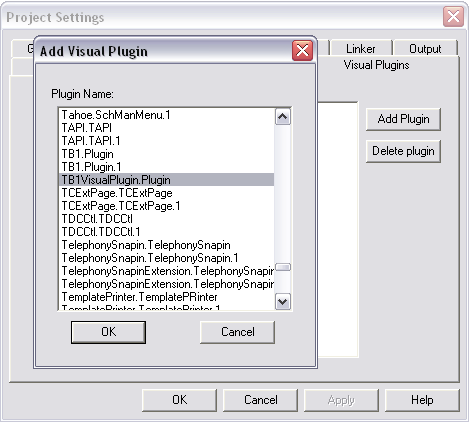
5. This dialog shows all available COM objects. You should select your Plug-in Module and click "OK". Selected Plug-in Module appears in list.
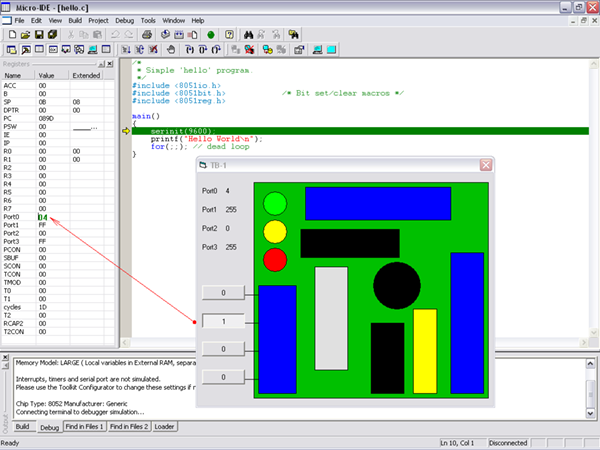
6. You can simulate your project now. If you use the TB1VisualPlugin.Plugin you will see a window like the one below with a picture of the TB-1 board with chips (rectangles), LED's (green, yellow and red circles) and ports (four buttons at the left side).
You can change the state of a port by clicking on corresponding button. All changes are immediately reflected in the Register Window.
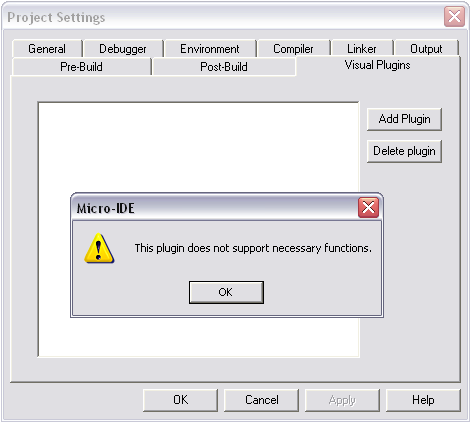
All Plug-in Modules are COM objects. You can develop Plug-in Modules in a high level language such as Visual BASIC. Each Plug-in Module must have the following methods:
- SetRegisters - receive state of registers
- StartDebugging - called when debugging has started
- EndDebugging - called when debugging finished
- CallCallback - this function is called from MicroIDE
If a Plug-in Module does not support these methods, when you try to add such a Plug-in Module to the Visual Plug-in Module list, you will get error message as shown below: