
Cart is empty.
Item Quantity Price Total: $0

Micro C 8051 Development System Quick Start Guide
Please download and install the latest release of the Micro C 8051 Development System.
Development software components include Micro-IDE, Micro C Compiler, simulator and debugger. Simulator and debugger are sold as separate add-ons and have separate serial numbers.
To install the DEMO version please use "1" as serial number. If you have already purchased a license, enter your serial number that came with the CD envelope.
To run your first C program please follow these instructions:
| 1- Start Micro-IDE from Start->Programs->Micro-IDE. | |
| 2- Open the project C:\bipom\devtools\MicroC\Examples\8051\tiny\hello\hello.prj using Project->Open Project menu option. When the project opens, you will see the source of the 'hello' program. | |
| 3- Press "Build All" icon button. This will generate hello.hex under C:\bipom\devtools\MicroC\Examples\8051\tiny\hello folder. | 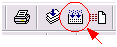 |
| 4- Press "Download" icon button on the toolbar. It should download hello.hex to the board. You should see the progress indicator. What if the download fails ? |
 |
| 5- Select View->Terminal to open the terminal window. | |
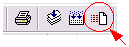
| 6- Press "Connect" icon button. It will connect the board to the terminal window. You can also use Tools->Terminal->Connect menu option. | 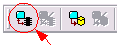 |
| 7. Change "SetMode" icon button to GREEN. You should see the "hello" message in the Terminal window. |  |
For more help, please read Help for Micro-IDE (8051 Dev System) under Help menu of Micro-IDE.